
How to use
日本語 · English · Português · Bahasa Indonesia · हिन्दी
Just pick your photos and videos. AI writes the caption, hashtags and narration and makes a vertical video (9:16) with background music — all in your phone's browser. This guide walks you through it with real screenshots.
1Sign up and log in
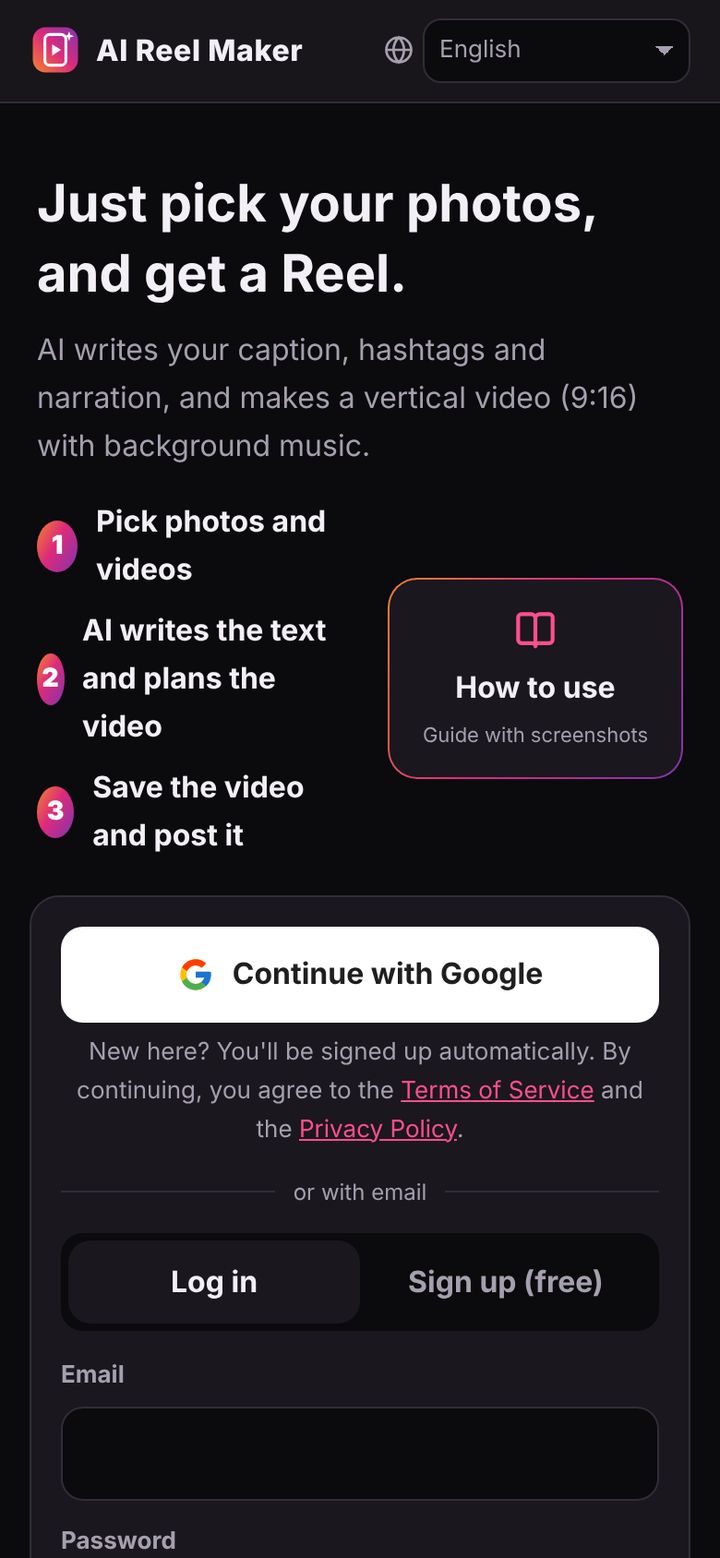
First, create a free account. There are two ways.
Sign up with Google (easiest)
Tap Continue with Google and choose your Google account. If you're new, you're signed up right away.
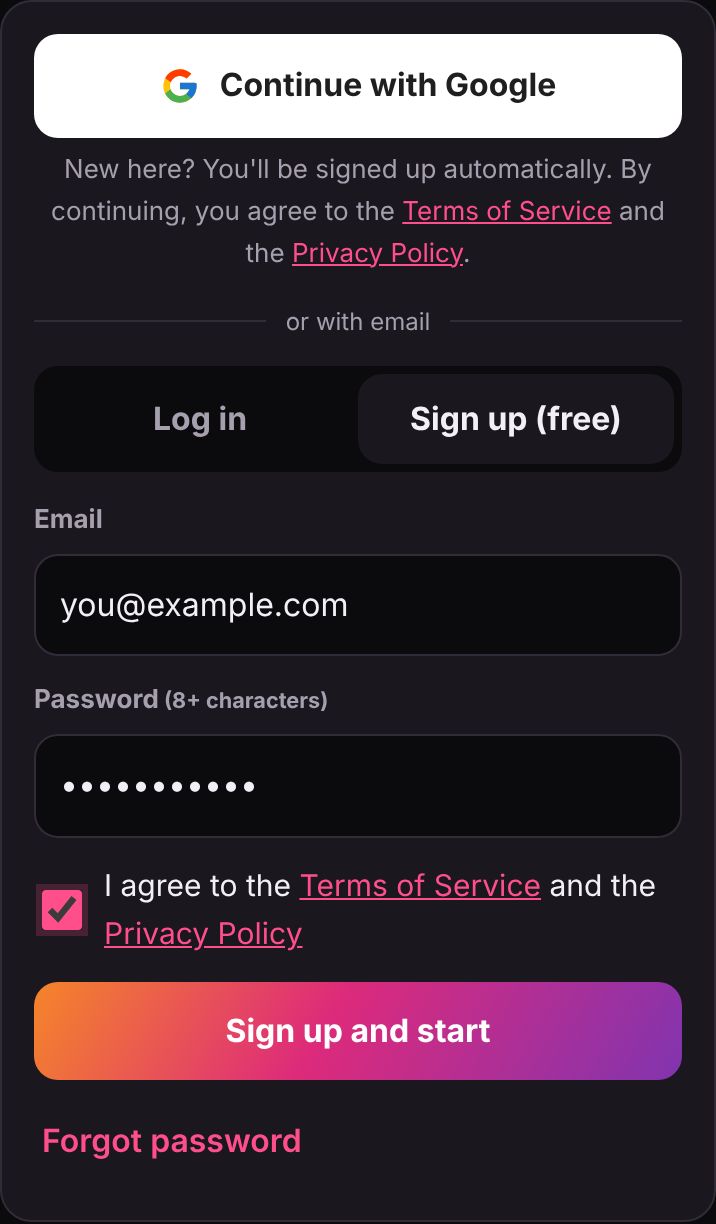
Sign up with email
- Tap "Sign up (free)".
- Enter your email address and a password of 8 or more characters.
- Read the Terms of Service and Privacy Policy, then check the box.
- Tap "Sign up and start".
Tip Even if you signed up with Google, you can set a password in Settings to also log in with your email. If you forget your password, use "Forgot password" on the login screen.
Screen language
Use the globe icon at the top right to choose the screen language: 日本語, English, Português, Bahasa Indonesia or हिन्दी. At first it follows your phone's language.
2Add your AI API key
This app uses your own AI "API key" to write text and make voices. An API key is like a password that lets the app use an AI service. Right after signing up, the Settings screen opens — add a key for at least one AI.
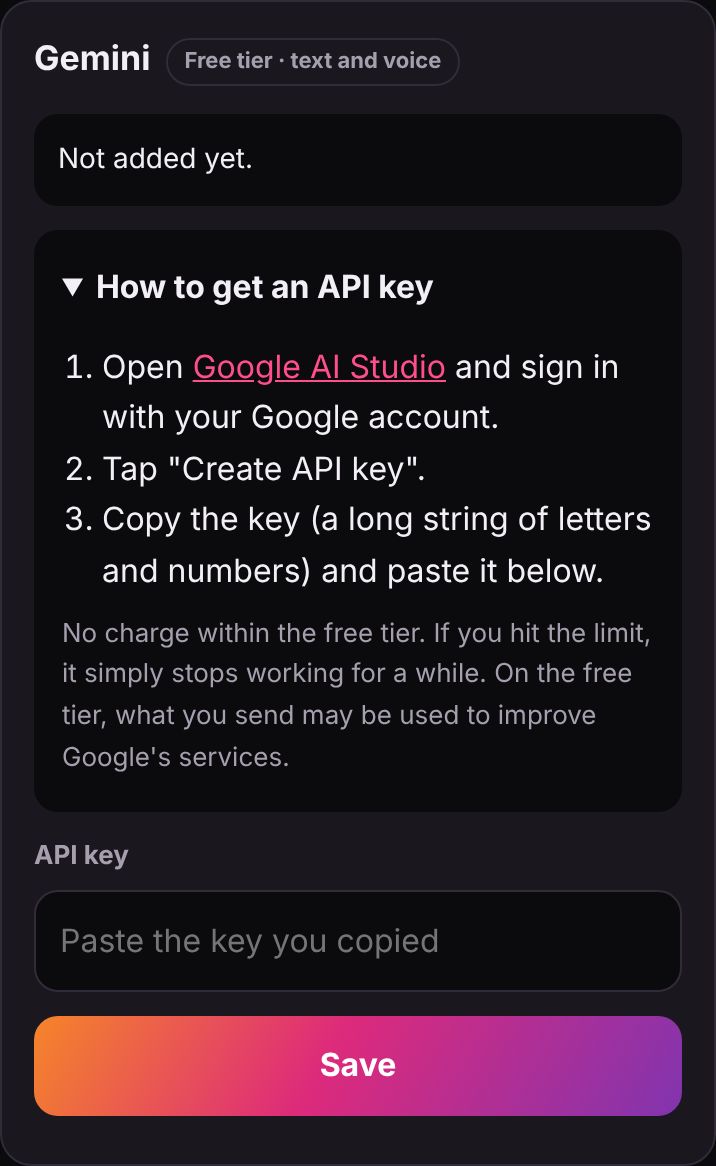
Get a key and paste it (example: Gemini)
- In the Gemini section of Settings, open "How to get an API key".
- Open the Google AI Studio link and sign in with your Google account. The first time, the terms of service appear; read them and agree.
- If the API key page does not open, tap "Get API key" with the key icon on the left side of the screen (or in the menu).
- Tap the "Create API key" button.
- If you are asked to choose a "project" for the key, create a new project or pick an existing one. If this is your first time, creating a new one is fine.
- The key (a long string of letters and numbers) appears. Tap the copy icon to copy it.
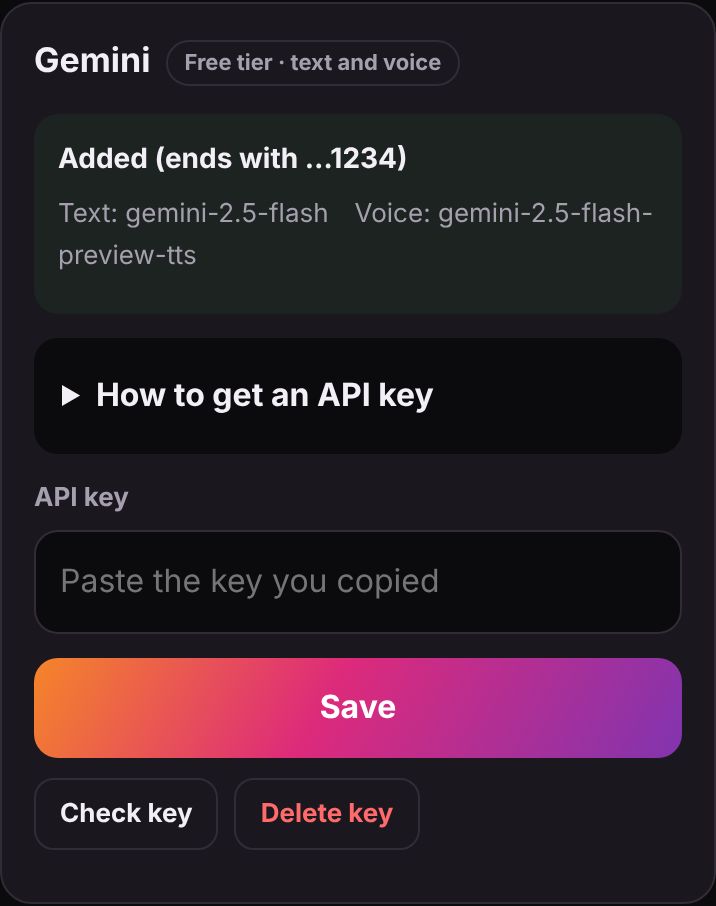
- Back in the app, paste it into the "API key" field and tap "Save".
When you save, the app checks with the AI service that the key really works. When it shows "Added (ends with …1234)", you're done.
Note Your API key is the password for using AI on your account. Do not show it to anyone or paste it on social media or in chats. It helps to keep a copy somewhere safe, such as a password manager. You can check or delete your keys in Google AI Studio at any time.
Peace of mind Keys are stored encrypted and used only for making your posts. For paid AI services, charges go to the key owner (you).
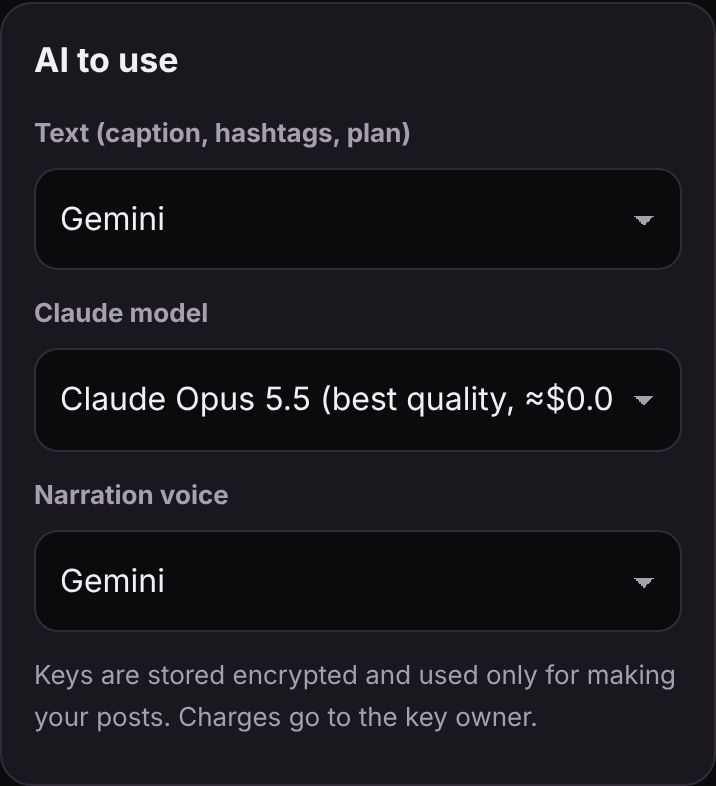
Choose which AI to use
Once you add two or more keys, you can choose an AI for each role under "AI to use" at the top of Settings.
- Text: the AI that writes the caption, hashtags and video plan (Gemini / OpenAI / Claude)
- Claude model: the balance of quality, speed and price when using Claude
- Narration voice: the AI that makes the voice (Gemini / OpenAI / none)
For example, you can combine "text by Claude, voice by Gemini".
3Which AI should I use? (features and prices)
Three AI services are supported. If you're not sure, start with Gemini, which has a free tier.
| Gemini (Google) | OpenAI | Claude (Anthropic) | |
|---|---|---|---|
| Price | Free tier If you hit the limit, it just stops for a while | Pay as you go (prepaid balance required) | Pay as you go (prepaid balance required) |
| Writing text | Yes | Yes | Yes |
| Narration voice | Yes | Yes | No (use Gemini or OpenAI for voice) |
| Approx. cost per run | Free within the free tier | A few cents for one caption plus ~30 s of narration | Opus ≈$0.05, Sonnet ≈$0.03, Haiku under $0.01 (one caption) |
| Key format | Long letters and numbers | sk-… | sk-ant-… |
Prices and free tiers can change at each provider's discretion. The figures above are rough estimates for this app — check each provider's pricing page for exact amounts.
Gemini Free tier · text and voice
- Google's AI. No charge within the free tier.
- One key does both text and voice, so it's great for beginners.
- At busy times, responses can be slow or fail. When that happens, the app automatically switches to a faster model.
- On the free tier, what you send may be used to improve Google's services.
OpenAI Paid · text and voice
- The AI from the makers of ChatGPT. Stable and fairly fast.
- Natural voices that follow the reading style, such as "bright" or "calm".
- Requires a prepaid balance under Billing.
Claude Paid · text only
- Anthropic's AI. Excellent at reading photos and writing natural, easy-to-read text.
- Three models: Opus 5.5 (best quality), Sonnet 5.5 (standard), Haiku 5.5 (fast and cheap).
- It can't make voices, so add a Gemini or OpenAI key too if you want narration.
- Requires a prepaid balance under Billing.
Recommended combinations
- Free to start: Gemini only (text and voice by Gemini)
- Stable and fast: OpenAI only (text and voice by OpenAI)
- Best writing: text by Claude, voice by Gemini or OpenAI
4Choose photos and videos and ask the AI
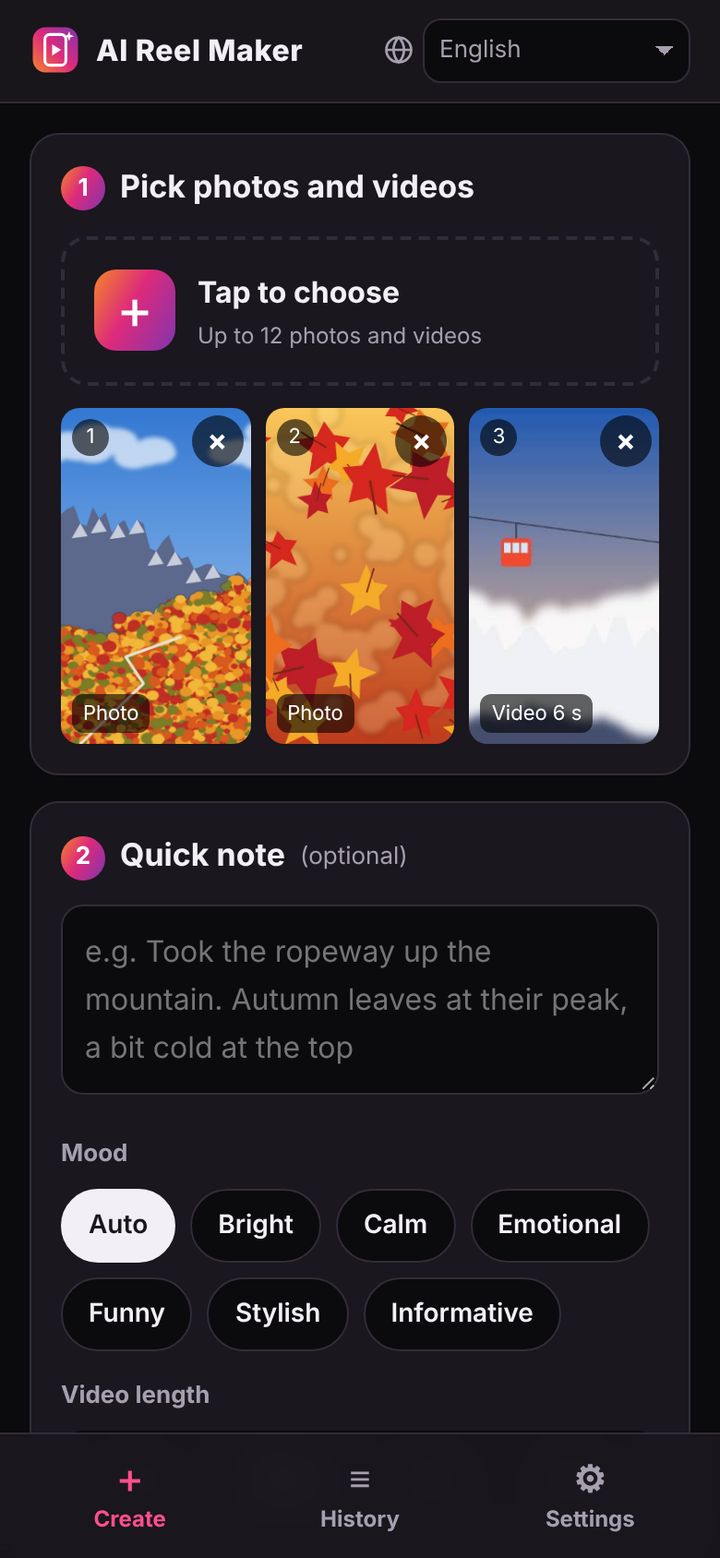
- Open the Create tab at the bottom.
- Tap "Tap to choose" and pick photos and videos (up to 12 in total). Remove any with "×".
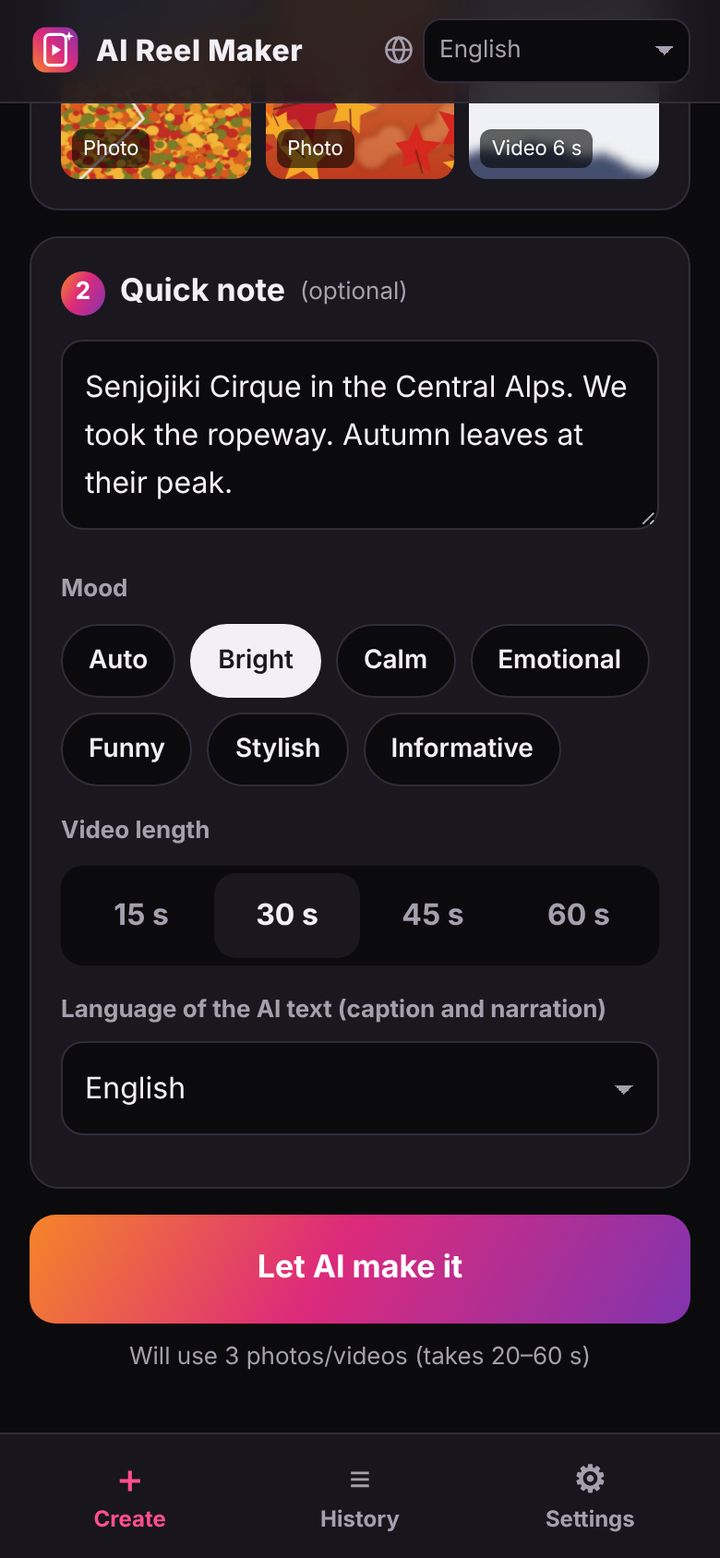
- Write a "Quick note" with the place or what you want to say (optional). Shop and place names written here appear correctly in the text.
- Choose the "Mood" and "Video length" (15–60 s).
- Under "Language of the AI text", choose the language of the caption, hashtags and narration. It's separate from the screen language, so you can, for example, keep the screen in English and post in Portuguese.
- Tap Let AI set it up. In about 20–60 seconds you get the text and the video plan, plus editing settings that match the mood you chose (camera movement for each scene, text design and size, music volume, the look and sound of the promo scene, and more). You can change all of them afterwards.
Tip Your photos and videos are never sent to our server — they stay on your phone. Only small still images are sent to the AI.
More files take longer. If it takes too long, try 6–8 files.
5Check and edit the text
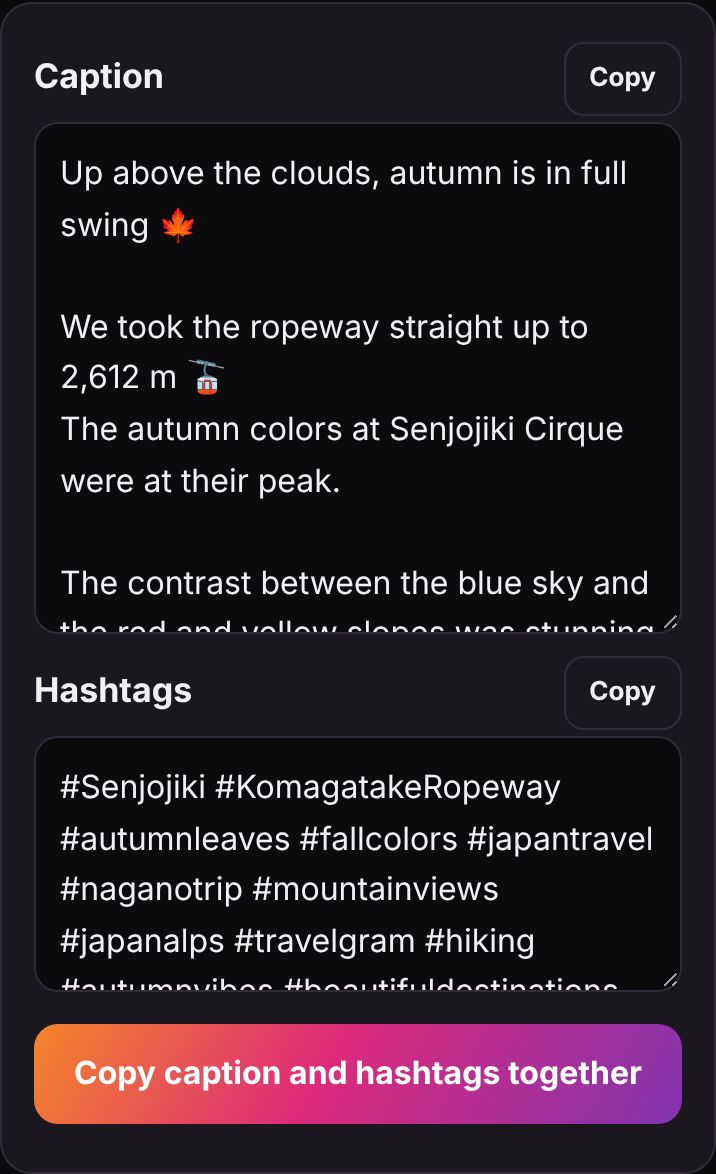
Caption and hashtags
The AI's caption and hashtags appear here. You can freely edit them.
- "Copy" copies each one.
- "Copy caption and hashtags together" lets you paste everything straight into Instagram.
Your edits are saved automatically.
Video content (scenes)
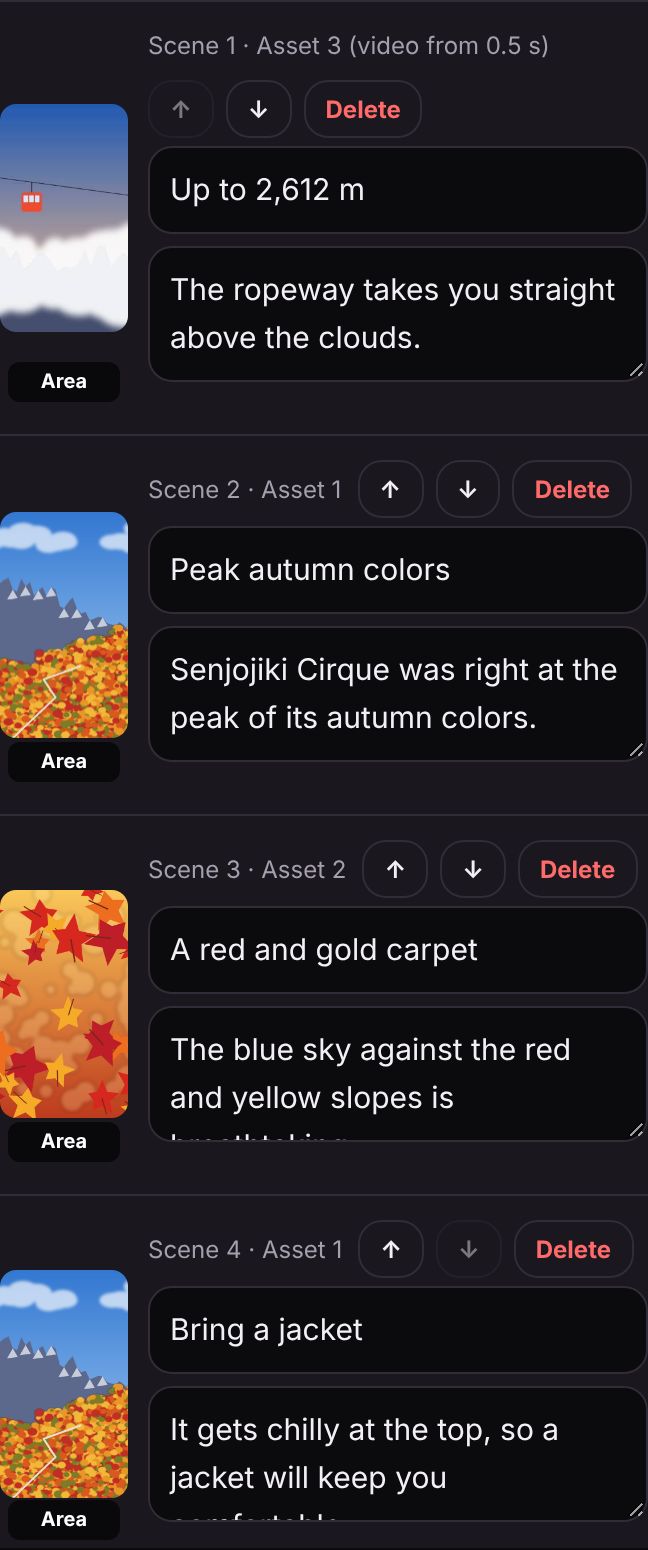
The video is split into "scenes". For each scene you can:
- Edit the title (short text at the top) and the narration (what is read aloud)
- Reorder with "↑" "↓", or remove with "Delete"
- Tap the image on the left ("Area") to choose the area to show (next chapter)
"Big opening text" is the catchy line shown large at the start of the video.
Not happy with it? Use "Ask AI to try again" at the bottom.
6Choose the area and motion
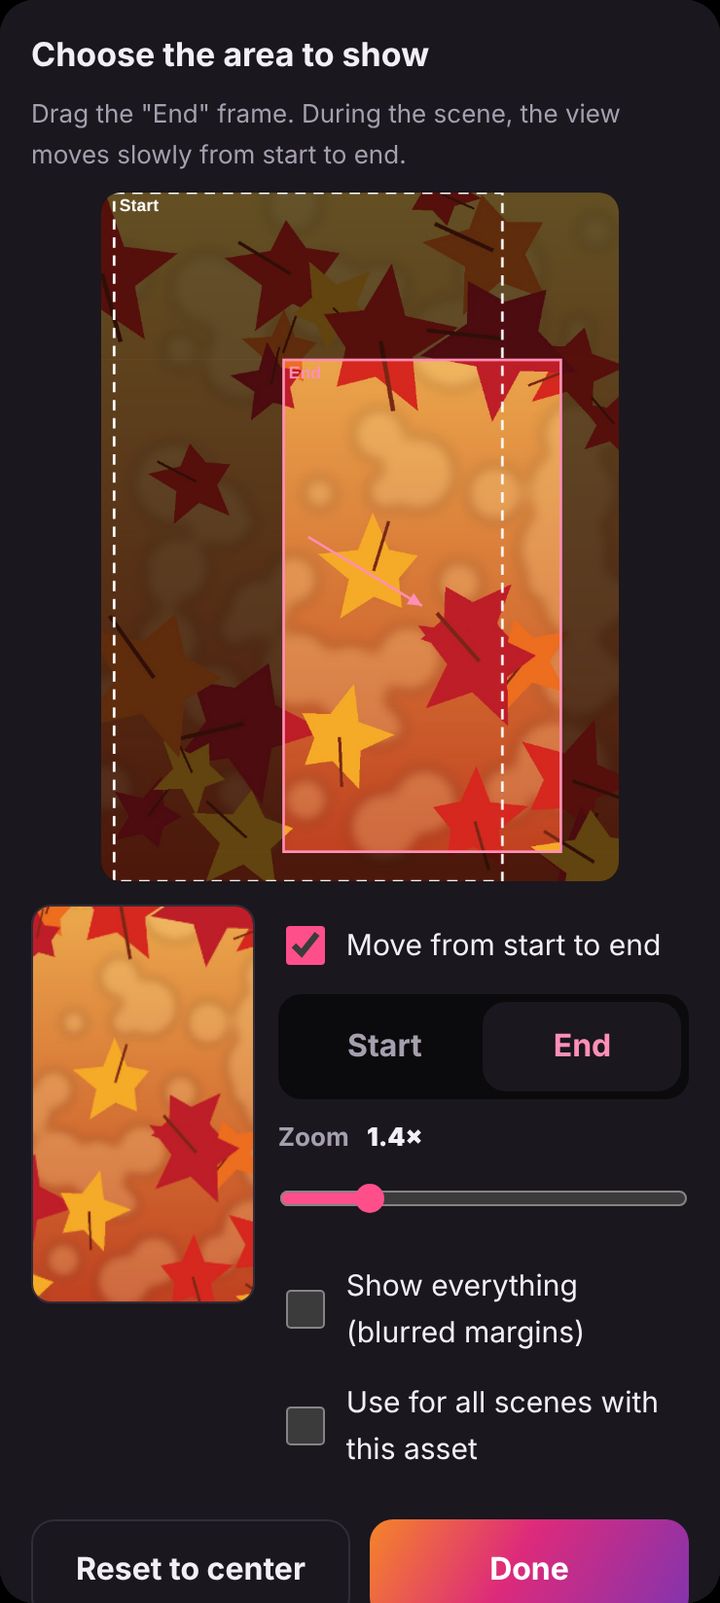
Landscape videos and photos are cropped to fit the vertical (9:16) screen. Tap a scene's image to choose what to show.
- Drag the frame: choose the area. The preview at the bottom left shows the result.
- Zoom: up to 3×.
- Show everything: no cropping. The top and bottom margins are filled with a blurred copy of the image.
- Use for all scenes with this asset: apply the same area to every scene using the same file.
Move from start to end
Turn on "Move from start to end" and the view slowly pans and zooms during the scene.
- Select "Start" and set the frame position and zoom.
- Select "End" and set them the same way.
- The arrow shows the direction; the preview shows the actual motion.
Tap "Done" to apply. Scenes with motion show "Motion" on their image.
7Voice, music and text design
Narration
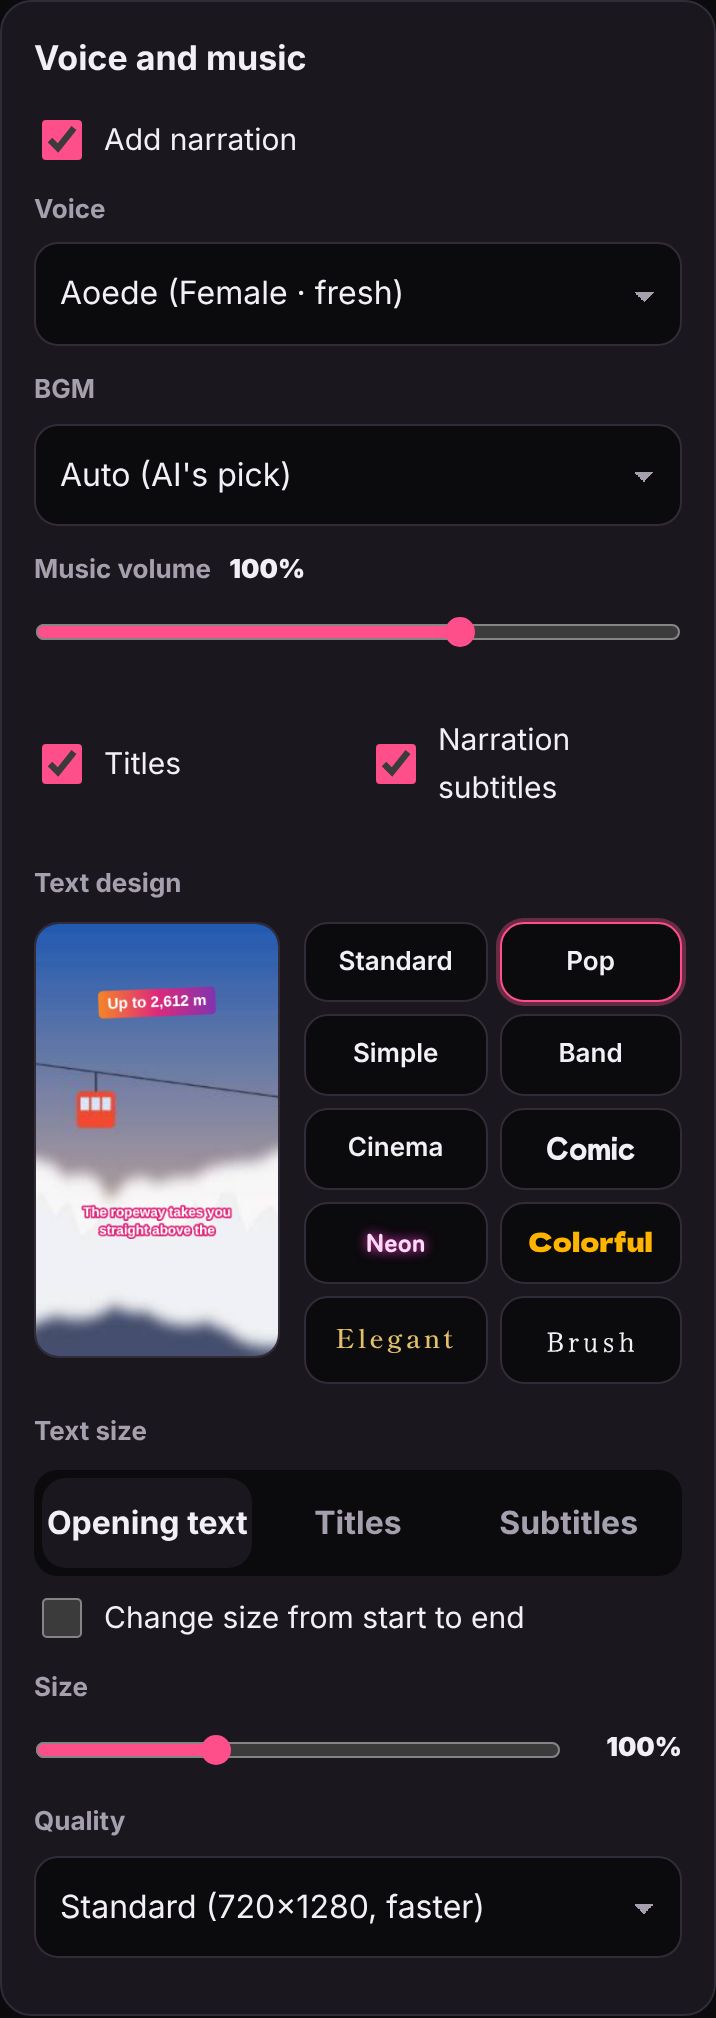
Turn on "Add narration" and pick a voice under "Voice". You need a key for a voice AI (Gemini or OpenAI). The voice reads in the language you chose for the AI text.
Music
- Auto: the app composes music in the mood the AI picked (no copyright worries).
- You can also choose Bright, Calm, Emotional, Exciting or Stylish.
- Use my own song: use a music file you have (mind the copyright).
- None: if you want to add music on Instagram later.
- Music volume: 0–150%. It automatically gets quieter during narration.
Text design
Choose from 20 designs for the opening text, titles and narration subtitles: Standard, Pop, Simple, Band, Cinema, Comic, Neon, Colorful, Elegant, Brush, Gym, Doggy, Kitty, Birdie, Speed, Autumn, Winter, Christmas, Christmas Pop, Lights. Watch the preview on the left.
Text size
Set the size of the opening text, titles and subtitles separately (50–200%). Turn on "Change size from start to end" to make the size change smoothly while it's shown.
Quality
Choose Standard (720×1280, faster) or High (1080×1920).
8Closing promo scene
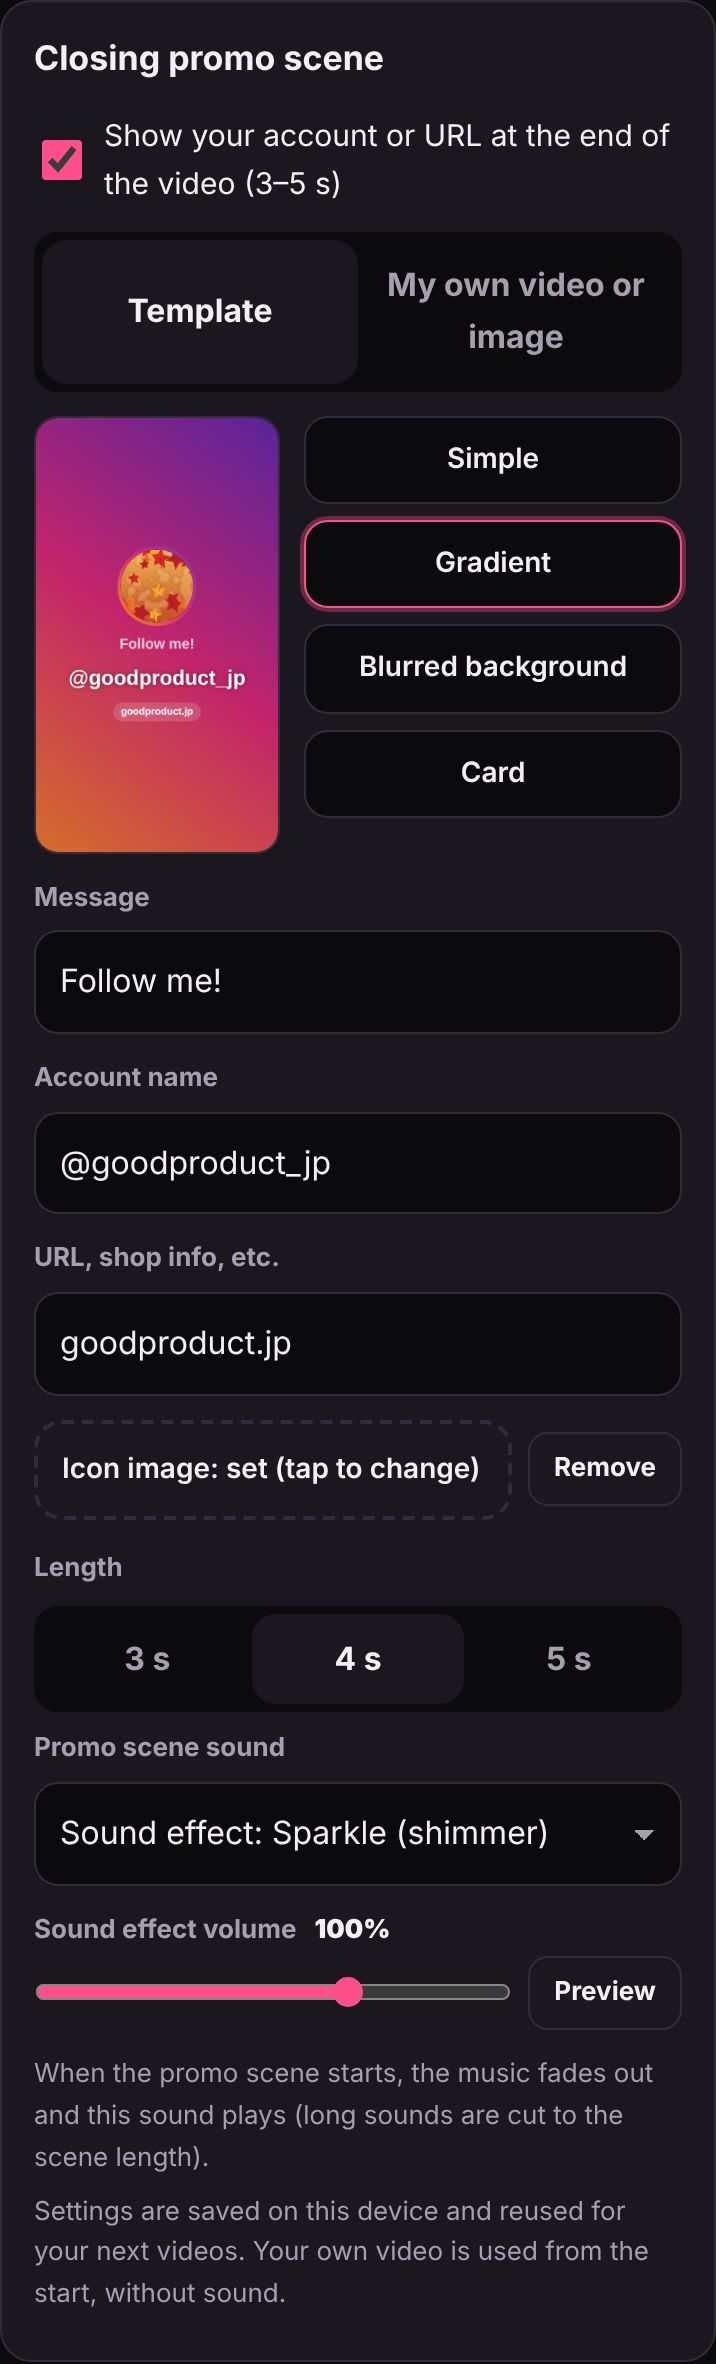
Add a 3–5 second scene at the end showing your account name or URL — handy for getting follows or promoting a shop.
- Turn on "Show your account or URL at the end of the video".
- Choose "Template" or "My own video or image".
- Template: Simple, Gradient, Blurred background, Card
- Own video or image: e.g. your logo animation (used without sound). You can overlay your account name and more.
- Enter a message (e.g. "Follow me!"), account name, URL or shop info, and an icon image.
- Choose the length (3, 4 or 5 seconds).
- Choose the "Promo scene sound": keep the music / a sound effect (Sparkle, Jingle, Fanfare, Music box, Pop, Whoosh) / your own sound / no sound. Tap "Preview" to listen.
Tip Promo scene settings and your own video are saved on this device, so you don't need to enter them again next time.
9Export and save the video
- Tap Make video at the bottom.
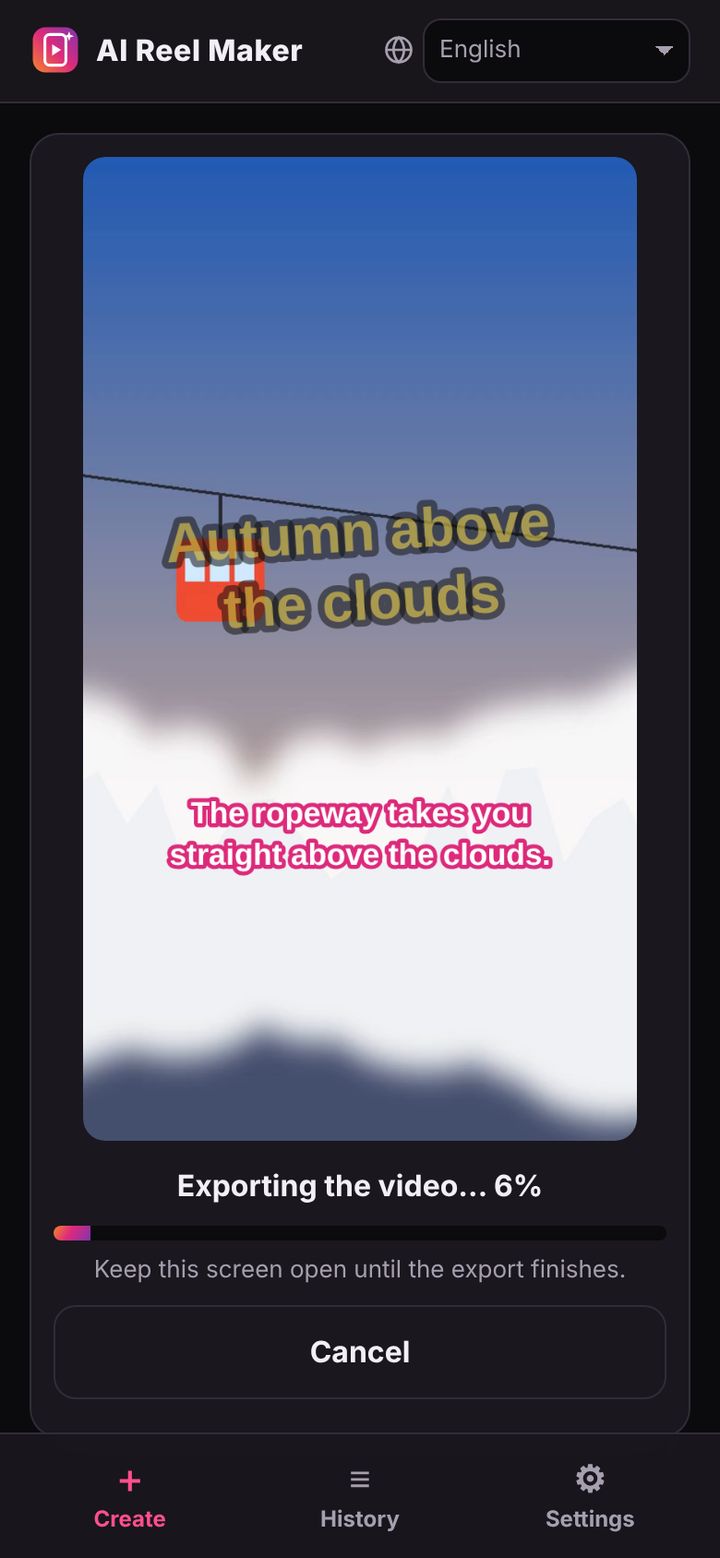
- After preparing the voice and music, the video is exported. It takes about as long as the video itself.
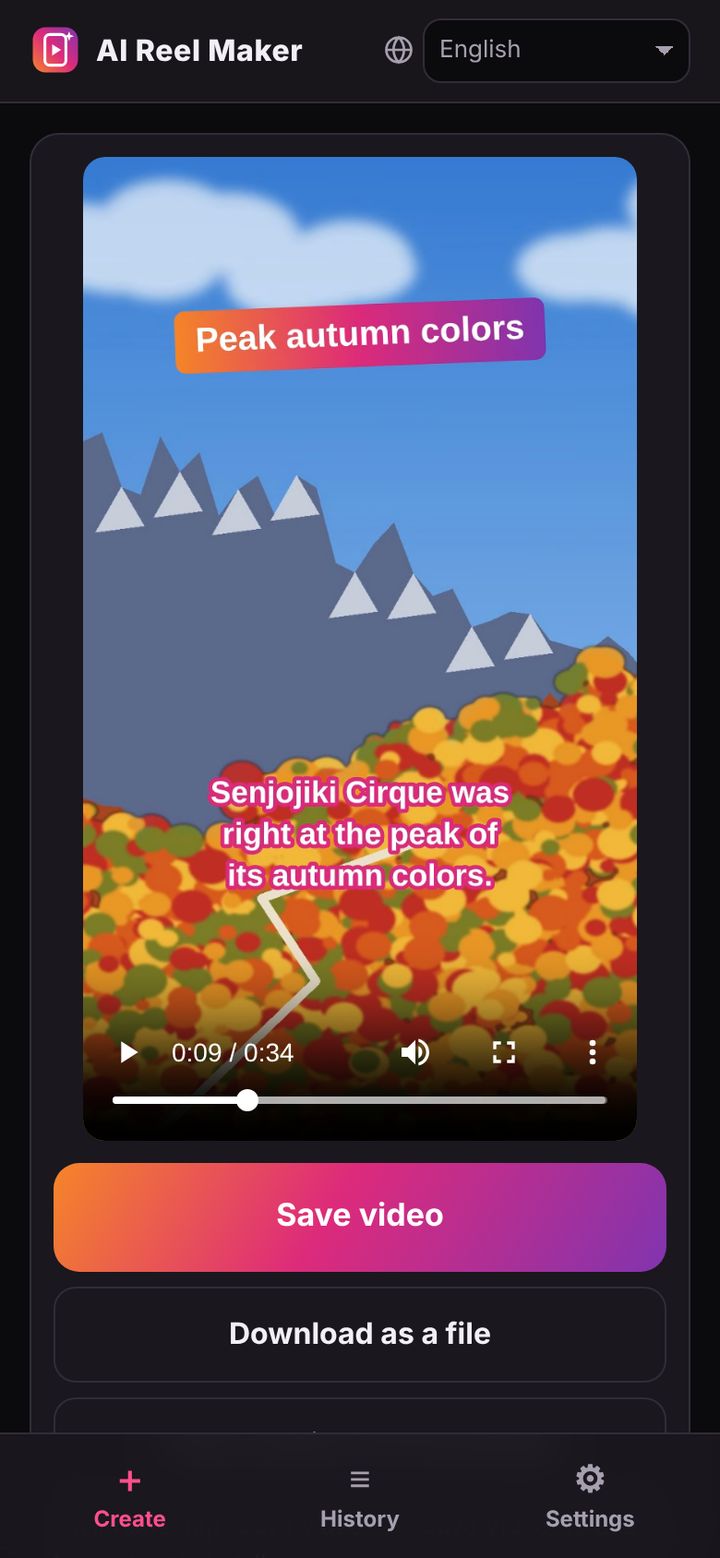
- When it's done, you can play it right there to check.
- Tap Save video.
- iPhone: choose "Save Video" to add it to your Photos (camera roll).
- Android and computers: it's saved as a file. "Download as a file" also works.
- Tap "Copy caption and hashtags" and paste them when you post the video on Instagram.
Important Keep the screen open while exporting. Switching to another app or turning off the screen stops the export.
10Your posts (history)
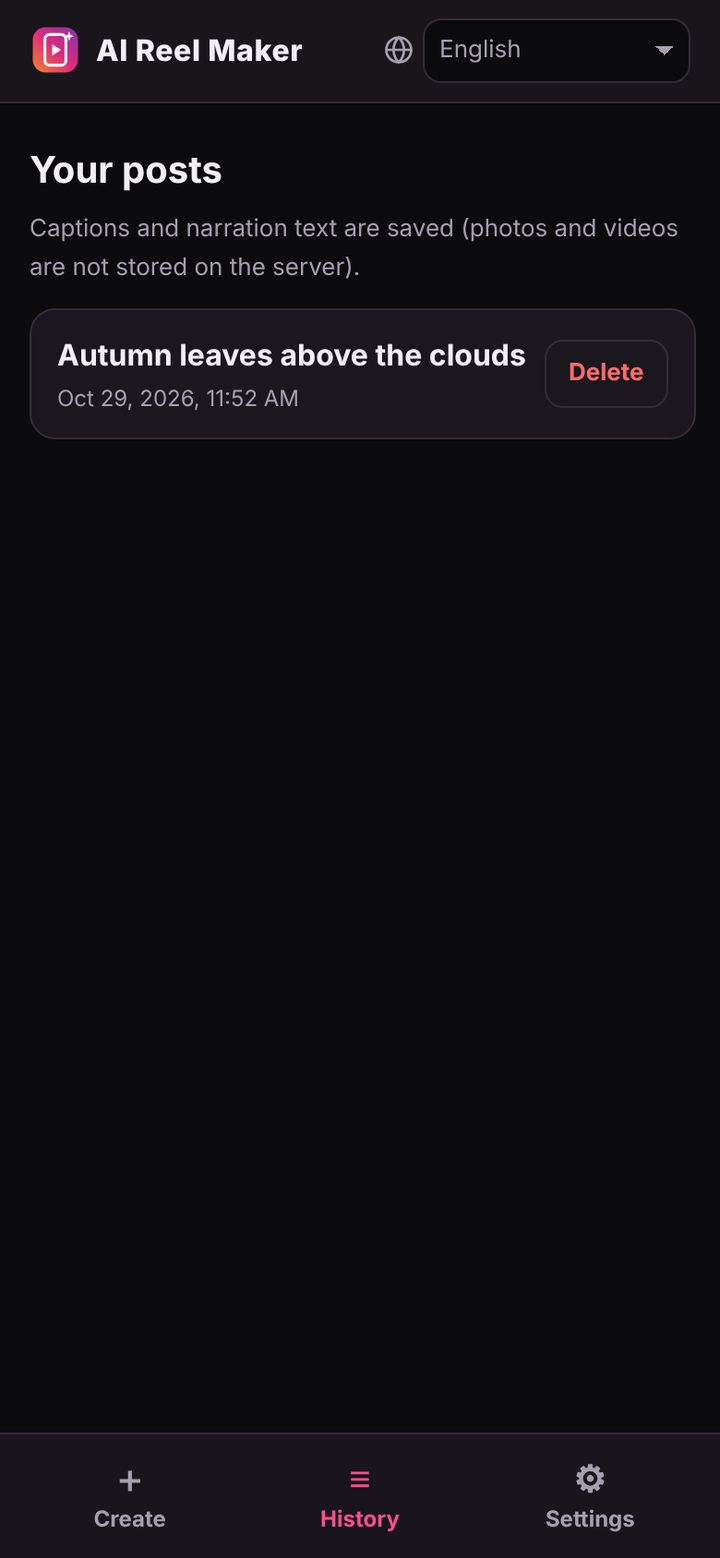
The History tab keeps the text of your posts (caption, hashtags, narration and more), newest first (latest 100).
- Tap a post to open it and edit or copy the text.
- Photos and videos aren't stored on the server, so to make the video again, choose the same photos and videos once more.
- Remove posts you don't need with "Delete".
11Troubleshooting
"The AI took too long to respond"
The AI may be busy. Try again in a moment, or use fewer photos/videos. This happens more often on Gemini's free tier at busy times.
"The API key is invalid" / "Check the key"
Make sure the key wasn't cut off when copying, and paste it again. OpenAI and Claude need a prepaid balance. "Check key" in Settings tells you whether it works now.
There is no narration voice
A key for a voice AI (Gemini or OpenAI) is needed. With only Claude, the video has subtitles only. Check "Narration voice" under "AI to use" in Settings.
The export stopped or was interrupted
Switching apps or turning off the screen during export stops it. Keep the screen open and tap "Make video" again.
"This device exported a WebM file"
This appears when your browser can't export MP4. If Instagram doesn't accept it, update your browser, or use Safari on iPhone or Chrome on Android.
I can't save the video on my iPhone
Tap "Save video" and choose "Save Video" in the menu. If no menu appears, tap "Download as a file" and move it from the Files app to Photos.
The screen went black or looks wrong
Reload the page. If that doesn't help, update your browser and try again.
Terms of Service · Privacy Policy
日本語 · English · Português · Bahasa Indonesia · हिन्दी